Monday, 21 March 2011
Graham Holland
Graham Holland is an award winning lens based artist, who specializes in creating evocative images of the urban world. Personal development and experimentation have propelled Graham's success, where he co-ordinates commissions in advertising and wall based works with self initiated projects for exhibition. Graham's photographic and post production abilities have seen him work on assignment in Dubai, New York, Venice, Budapest, Rome and throughout the UK.
Graham studied BA Fine Art at the University of Central Lancashire and MA Photography & Urban Culture at Goldsmiths. Since completion of his degree he has gone on to exhibit in over seventy exhibitions and is collected throughout the UK, America and Europe. Exhibitions include, Holland and Sexty at the Woolff Gallery, London Calling, Holland and Sexty at Kingly Court, Life in the City, London Art Fair, Xposure, Metropolis, Art New York, Windows, Still, Art Palm Beach, Spirit of Place, Contemporary Camera, Reconstructed Places and Location Location Location. Clients include, Q Magazine, Allen & Overy, Starbucks, Honda, Transport for London, The London Studios(LWT), Carling, JD Wetherspoon, Pizza Express at Gatwick Airport, Bruntwoods(Official Partner Commonwealth Games), BBC, Shaftesbury plc, National Health Service and Pictons.
Graham's work has also been extensively featured in the TV programme Home on ITV and culture magazine Blueprint. Other media attention includes Broadcast, Property Week, Dream and A-N magazine.
http://www.gdhcityscapes.co.uk/index.html
Blackpool
Glasgow
Luton
Graham Holland's work is very interesting because it takes a different approach to the depiction of a cit. He doesn't sky away from the fact that city's are extremely crowded, busy, and sometimes unfriendly places, but instead creates pieces that not only show these qualities, but depict them in a positive light. I love how different his work is, and how he has used modern photo editing software to his advantage to create large scale vibrant photo montages of some of the biggest cities on the U.K.
Final Idea
For my final 3 composite pieces I have taken inspiration from Graham Holland's cityscapes (examples seen below).
"In his world, the city isn't dark and brooding but light, buzzing and congested. He manages to capture both the optimism and the frustration of living in a metropolis where dreams can either be realised or crushed in an instant. He's an artist to watch for the future" as said by Grant Gibson - Editor of Blueprint where Hollands work is featured often.
I did not want to copy the analogy he has behind his work, however, so I chose to investigate ans show how eventually the city will not be prominent over nature. Someday the buildings will wither and decay leaving nature still in it's all powerful place. It follows the thinking of whenever you put weed killer down, you kill part of the weed but it always finds another crack to pop up through.
For my first piece I want to create a countryside-scape. This will be a depiction of times we live in now where nature is being trampled on my human technology, the invasion of pollution, and modern life. This piece will reflect where earth is at now.
My beach scape will also follow on from this idea, depicting a beach that’s normal beauty has been overtaken by, again, pollution from things such as oil leaks and objects disposed of into the sea. It will snow no actual human life, but it's presence will be felt through it's environmental impact. Other objects not usually associated with the lovely seaside image will be placed onto the beach to follow on from my first piece showing the intrusion onto the countryside.
I want my 'cityscape' to be the final piece. A reflection of Mother Nature taking back what has always been and always will be hers, depicting the city as overtaken and diminishing under natures power. No people are present again, because now human life itself has surrendered to natures will. This will lead onto my final cityscape where nature has once again become top dog.
Friday, 18 February 2011
Layers -Blending Modes
This is a simple blending mode to show how you can adjust colour slightly. I simply made a new layer, selected the colour I wanted and chose layer - new fill layer - solid colour. I then changed the blending mode to colour and changed the opacity to make the colour blended further. The tone of the image is retained then and an interesting effect is achieved.

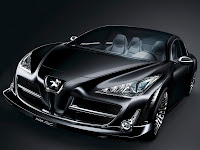
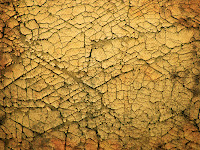
 The next example is a blending mode to create texture. On the texture layer I changed the blending mode to darken and then added a layer mask. Then I removed the texture around the outside of the car so it was as if it was only applied onto the car.
 Layer Mask
The man and the trees were dragged onto the cloud image. They were re-ordered with the trees at the top, and clouds at the bottom with their opacity turned down. The man was the layer that needed to be cut out from so the layer mask was added onto his layer by clicking the layer mask button located at the bottom of the right hand side layers panel (the same symbol for the quick mask). I then painted over the man, making sure the black square was at the front, and he reappeared on the top as if brought forward to the top layer. Remembering if you draw too much then you can always just bring the white square forward and paint over the areas that have been selected in error, then the background appears to come forward. When doing that though, you need to be clicked on the actual layer mask square on the layer, not just the layer. To the right is the final image.


We then used the layer mask to smooth out a woman's wrinkles. I first duplicated the layer and then added a Guassian blur of about 1.5 radius, which adds a soft blue to the whole photo. I then added a layer mask and painted over the areas that need to be crisp like the eyes, hair, mouth, remembering to keep the black square at the front! For areas's such as they eyes, it's useful to bring the opacity down because then the effect is softer and looks more blended. Obviously all of her wrinkles have not been removed, you would then have to use the heal tool or the patch tool afterwards, but it's s start, and is an example of using a layer mask for another scenario.
Original Layer Mask Edit
With this layer mask the pigeon needed to look as if it was in motion and the background remains crisp. I first duplicated the layer, added a motion blur to the new layer, and then a layer mask. Making sure my black square was in the foreground i then painted onto everything surrounding the pigeon brining the background back clear again, and the pigeon being the only part with the motion blur filter visible. Just another example of the uses of as layer mask.
Layers- Smart Filters
A smart filter is useful compared to just applying a filter, because it adds a separate layer and allows you to go back and change it at any point, obviously as long as you save it as a photoshop file. You can also then change the filter to any other one instead of having to remove a present filter and start again.
In this example, the wall was selected using the quick selection tool and then filters - convert for smart filters and a motion blur filter was chosen. The filter was then changed in direction so that the blur was then vertical for a different effect.
Horizontal motion blur
Vertical motion blue
Layers - Smart Object
Sometimes when you free transform a photo smaller, then decide you want to make it a bit bigger or even return it to its original size, on stretching it back you notice the image then becomes blurred which can be incredibly annoying. The smart object tool allows you to avoid this. Found under layer - smart object - convert to smart object this tool keeps the image information intact so that if you decide to extremely change the size, you will always be able to get back to your original sized image, and it be as clear as it once was. Below are 2 examples, the photograph free transformed without smart object applied, and with. the difference is definitely noticeable and this tool is very useful.
Layers - Scrapbook
This exercise was again to use layers in different orders, but this time there were layer styles and text added. The photo was added into the other set of layers and the white border of it was removed. The paper texture layer had the opacity turned down and blending changed from normal to luminosity. The photo and the letter layers were then linked together, or merged, free transformed smaller and moved down the page. 'Scrapbook'was added in century gothic font style, 72 pt. with the layer style of bevel and emboss - inner bevel, depth 50%, drop shawdow, pale orangey shade. the other text layer was then changed from being hidden and edited to a '3'. The letter and photo layer were then given a drop shadow, 50% opacity, size 10px. And the image was complete. A good tool to remember when doing effects with layers is if you hold Alt and click onto where it says effect on the layer you have applied the effect to, you can then drag the effect onto another layer, or all of them.
Layers - Salad
This was an exercise to show that we can create new layers and move them around inside an image. We had to individually put all the different elements onto their own layers, name them accordingly, and place all the food onto the chopping board.
Original
Final Layer Edit
Layers - Introduction
Our introduction to layers consisted of the basic movement of layers, naming of layers, and placement of the layer objects. We got the original images below and had to move them so that Micky appeared behind the car. This mean we had to use a selection tool - i used the magic wand - to select the background then invert it and copy that to a new layer. Then Micky could be placed behind the new layer. We then had to free transform the hat so that it was i proportion with Micky ass if he was wearing it. I removed the background because you couldn't see Micky's ears.
This is the final result below...
Monday, 14 February 2011
Final Techniques All Together
Contrast, colour balance & unsharp mask
match colour with other portrait
______________________________________
contrast, colour balance & unsharp mask
then colour matched with other portrait
_______________________________________
contrast, colour balance & unsharp mask
colour matched with other landscape
_____________________________________
contrast, colour balance & unsharp mask
colour matched with other landscape
Filters
Photo (Colour) Filter
original
cooling filter
__________________________________________________
General Filter
You can add more than one filter to an image by clicking the box at the bottom of the filter gallery next to the bin. Effectively this adds another layer and they can be swapped around in different orders.
Original
Note Paper Filter
__________________________________________________
Dust & Scratches Filter
This filter helps primarily with images that are from film camera, that you have scanned into photoshop. You should be able to remove the majority of the dust on the image and the scratches with this very handy tool. As a general rule the threshold, if higher, will change the images less, and if lower, will change the image more.
______________________________________
Render - Lighting Effects
Style -RGB lights
Style - Five lights down
______________________________________
Unsharp Mask
Radius
0.2 (Always keep low)
Lower radius - sharpens edge pixels.
Higher radius - sharpens all around and can create a crazy effect.
Amount
500%
Theshold
the higher it is, the less it will do
Subscribe to:
Comments (Atom)


